After the wedding comes the thank-you marathon. The Thank You Cards page gives you a designed card you can personalize once and send to everyone — each one addressed to the guest by name — so the gratitude feels personal without you hand-lettering eighty cards.
Pick a template, then personalize
Like the save the date, this page has two stages:
- Gallery — browse thank-you card templates, filtered by style
- Editor — personalize the chosen card on a live canvas
Press Select on a template to open it in the editor.
Personalizing the message
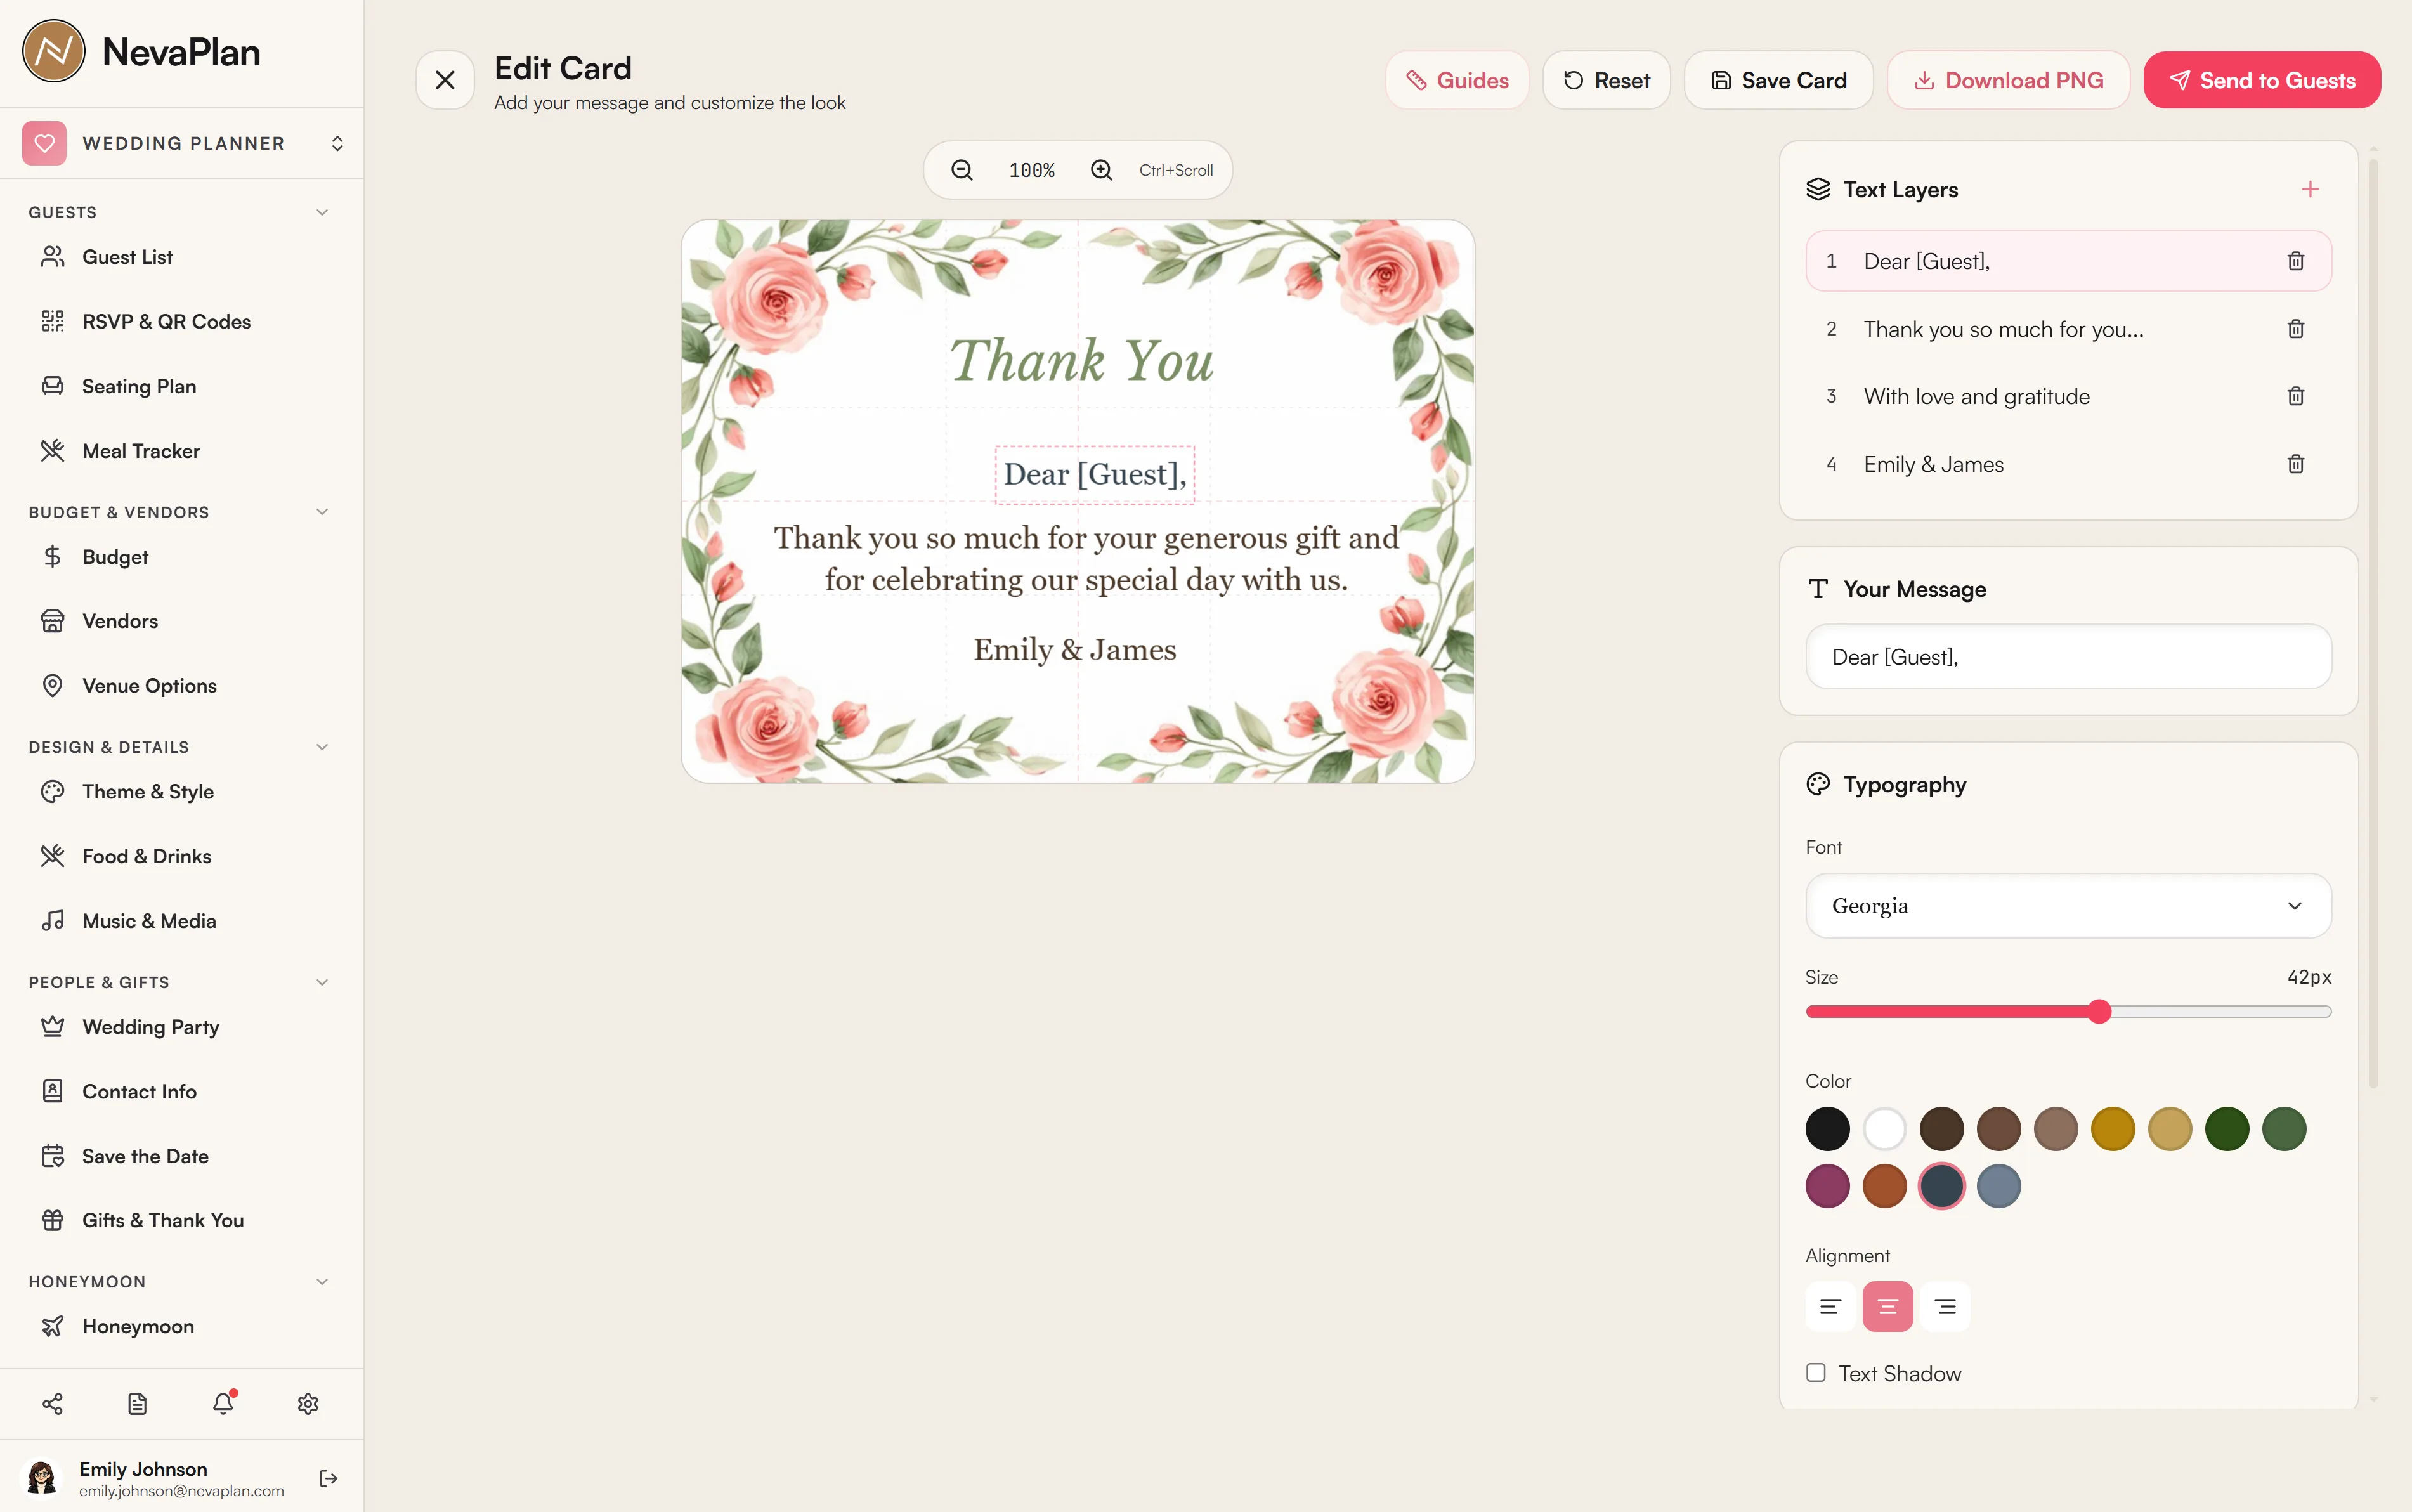
The card comes with sensible default text layers — a greeting, the message body, a sign-off, and your names. Edit each layer's:
- Wording
- Font, size, and color
- Alignment and an optional text shadow
- Position — drag the text on the canvas to place it
Two things fill in automatically:
- Your names come from your wedding setup (the sign-off already says the right thing)
- A
[Guest]placeholder becomes each recipient's name when you send — so "Dear [Guest]," turns into "Dear Sarah," per card
Write the message body to work for everyone — warm but general ("thank you for celebrating with us and for your kind generosity"). The [Guest] placeholder handles the personal touch in the greeting; you don't need to customize the body per person.
Save, download, send
- Save — keeps your design; the editor reloads it next time
- Download PNG — a high-resolution export for printing or sending yourself
- Send to Guests — takes you to the Gifts & Thank You page, where you send the card per guest by email or WhatsApp and track who's been thanked
The sending and tracking happen on the Gifts & Thank You page — this page is where you design the card; that page is where you send it and mark each guest as thanked.
The workflow, end to end
- Design the card here — template + personalized message
- Go to Gifts & Thank You — record who gave what, then send the card
- Each send is tracked per channel (email vs WhatsApp), so your "still to thank" list shrinks as you go
Design and save the card before you start sending. The send flow on the Gifts page uses your saved card — if you haven't saved a design, there's nothing to send. Save first, send second.
Next steps
- Record gifts and send thank-yous on the Gifts & Thank You page
- Make sure guests have emails/phones so the card can reach them
FAQ
Yes — the [Guest] placeholder is replaced with each recipient's name at send time, so every card is individually addressed. Your own names are filled in from your wedding setup. You design once; the personalization happens per guest automatically.
On the Gifts & Thank You page. This page designs the card; that page sends it (email or WhatsApp) and tracks who's been thanked. The "Send to Guests" button here takes you there.
Yes — Download PNG exports a high-resolution image suitable for print. Some couples print and hand-write a line, others send digitally; the card design works for both.
No — that's the point. You personalize one card; the greeting fills in each guest's name automatically. Keep the body general and let the placeholder do the per-guest work.
Save the updated design and subsequent sends use the new version. Cards already sent aren't recalled or changed — so settle the wording before a big batch.