To let guests respond online, you set up the RSVP system in 4 steps: activate, generate links, send, and track. This article covers the main flow and the finer points.
1. Activate RSVP
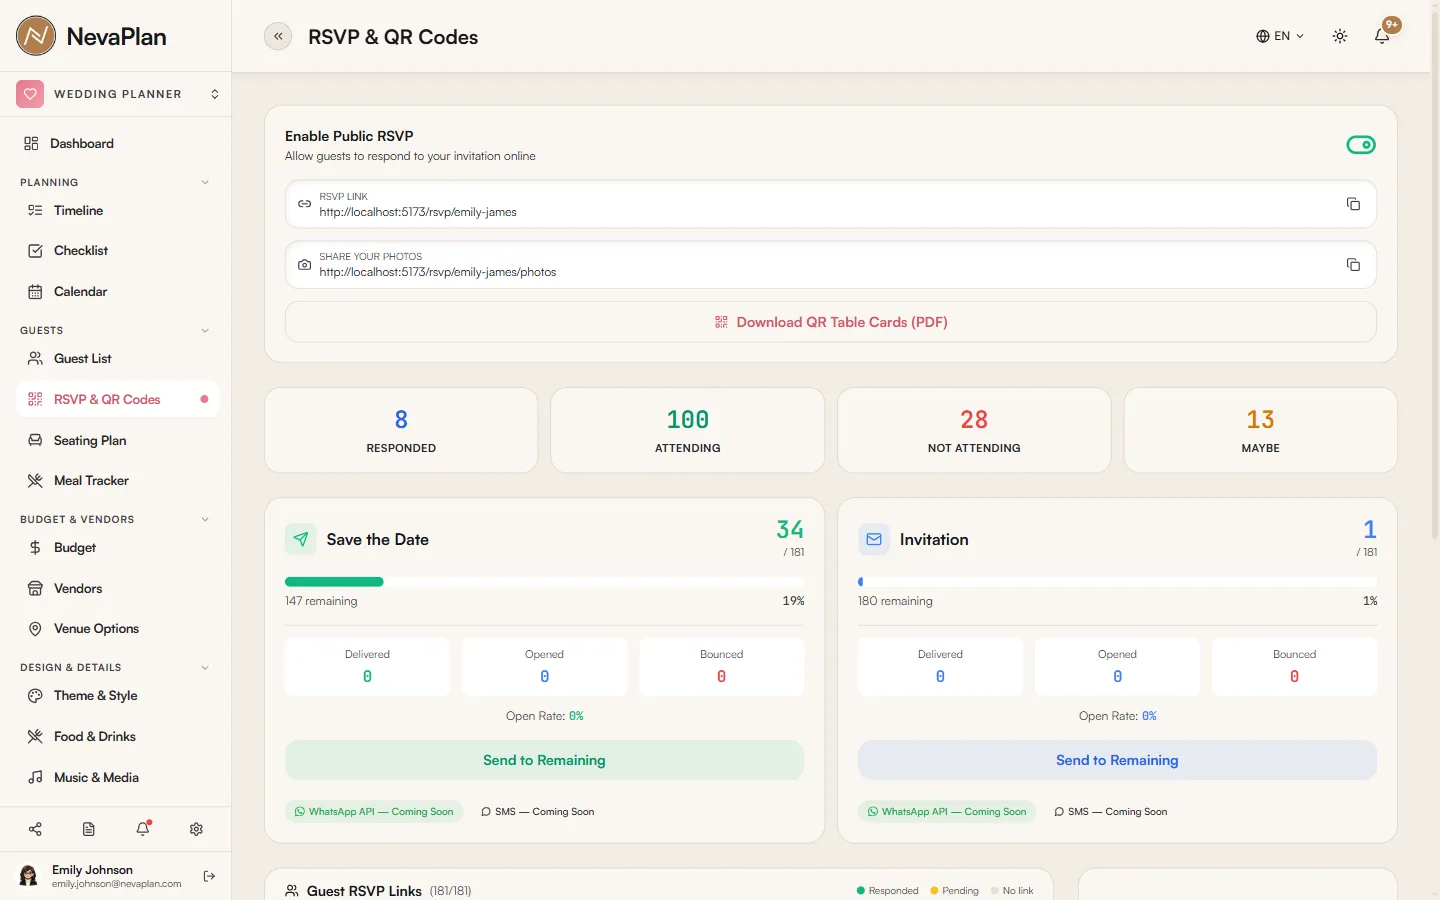
Turn on the Enable Public RSVP switch at the top of the page. The description next to it:
Allow guests to respond to your invitation online
The moment you turn it on, the system automatically generates your unique event code — for example sarah-michael-2026 — and creates a personal RSVP link for every guest. The event code goes into the URL of your public RSVP page: nevaplan.com/rsvp/sarah-michael-2026. (In the rare case the code doesn't appear, a Generate Event Code button shows up so you can create it manually.)
Until an event code exists:
- Guest links won't work
- The public RSVP page won't open (empty state: "Create couple page to enable RSVP")
2. Generate guest links
Each guest needs a personal link carrying a unique token. Enabling RSVP already generates these for everyone on your list — but as you add guests later, you can top up with either method:
- Generate All — (re)generates links for all guests at once. Result toast: "{{count}} RSVP links generated"
- Individual Generate — only for the guest you select
After links are generated, three icons appear on each guest row:
- Copy Link — copies to clipboard, toast: "Link copied!"
- Show QR code — shows the link as a QR code
- Share via WhatsApp — opens WhatsApp sharing, toast: "Shared via WhatsApp"
WhatsApp sharing doesn't use the API directly — it opens the message the system prepared in the WhatsApp app, and you press "Send". The message is generated per guest with a language and a tone (formal / friendly / fun), so it comes out in the guest's language ready to send.
3. Send invites in bulk by email
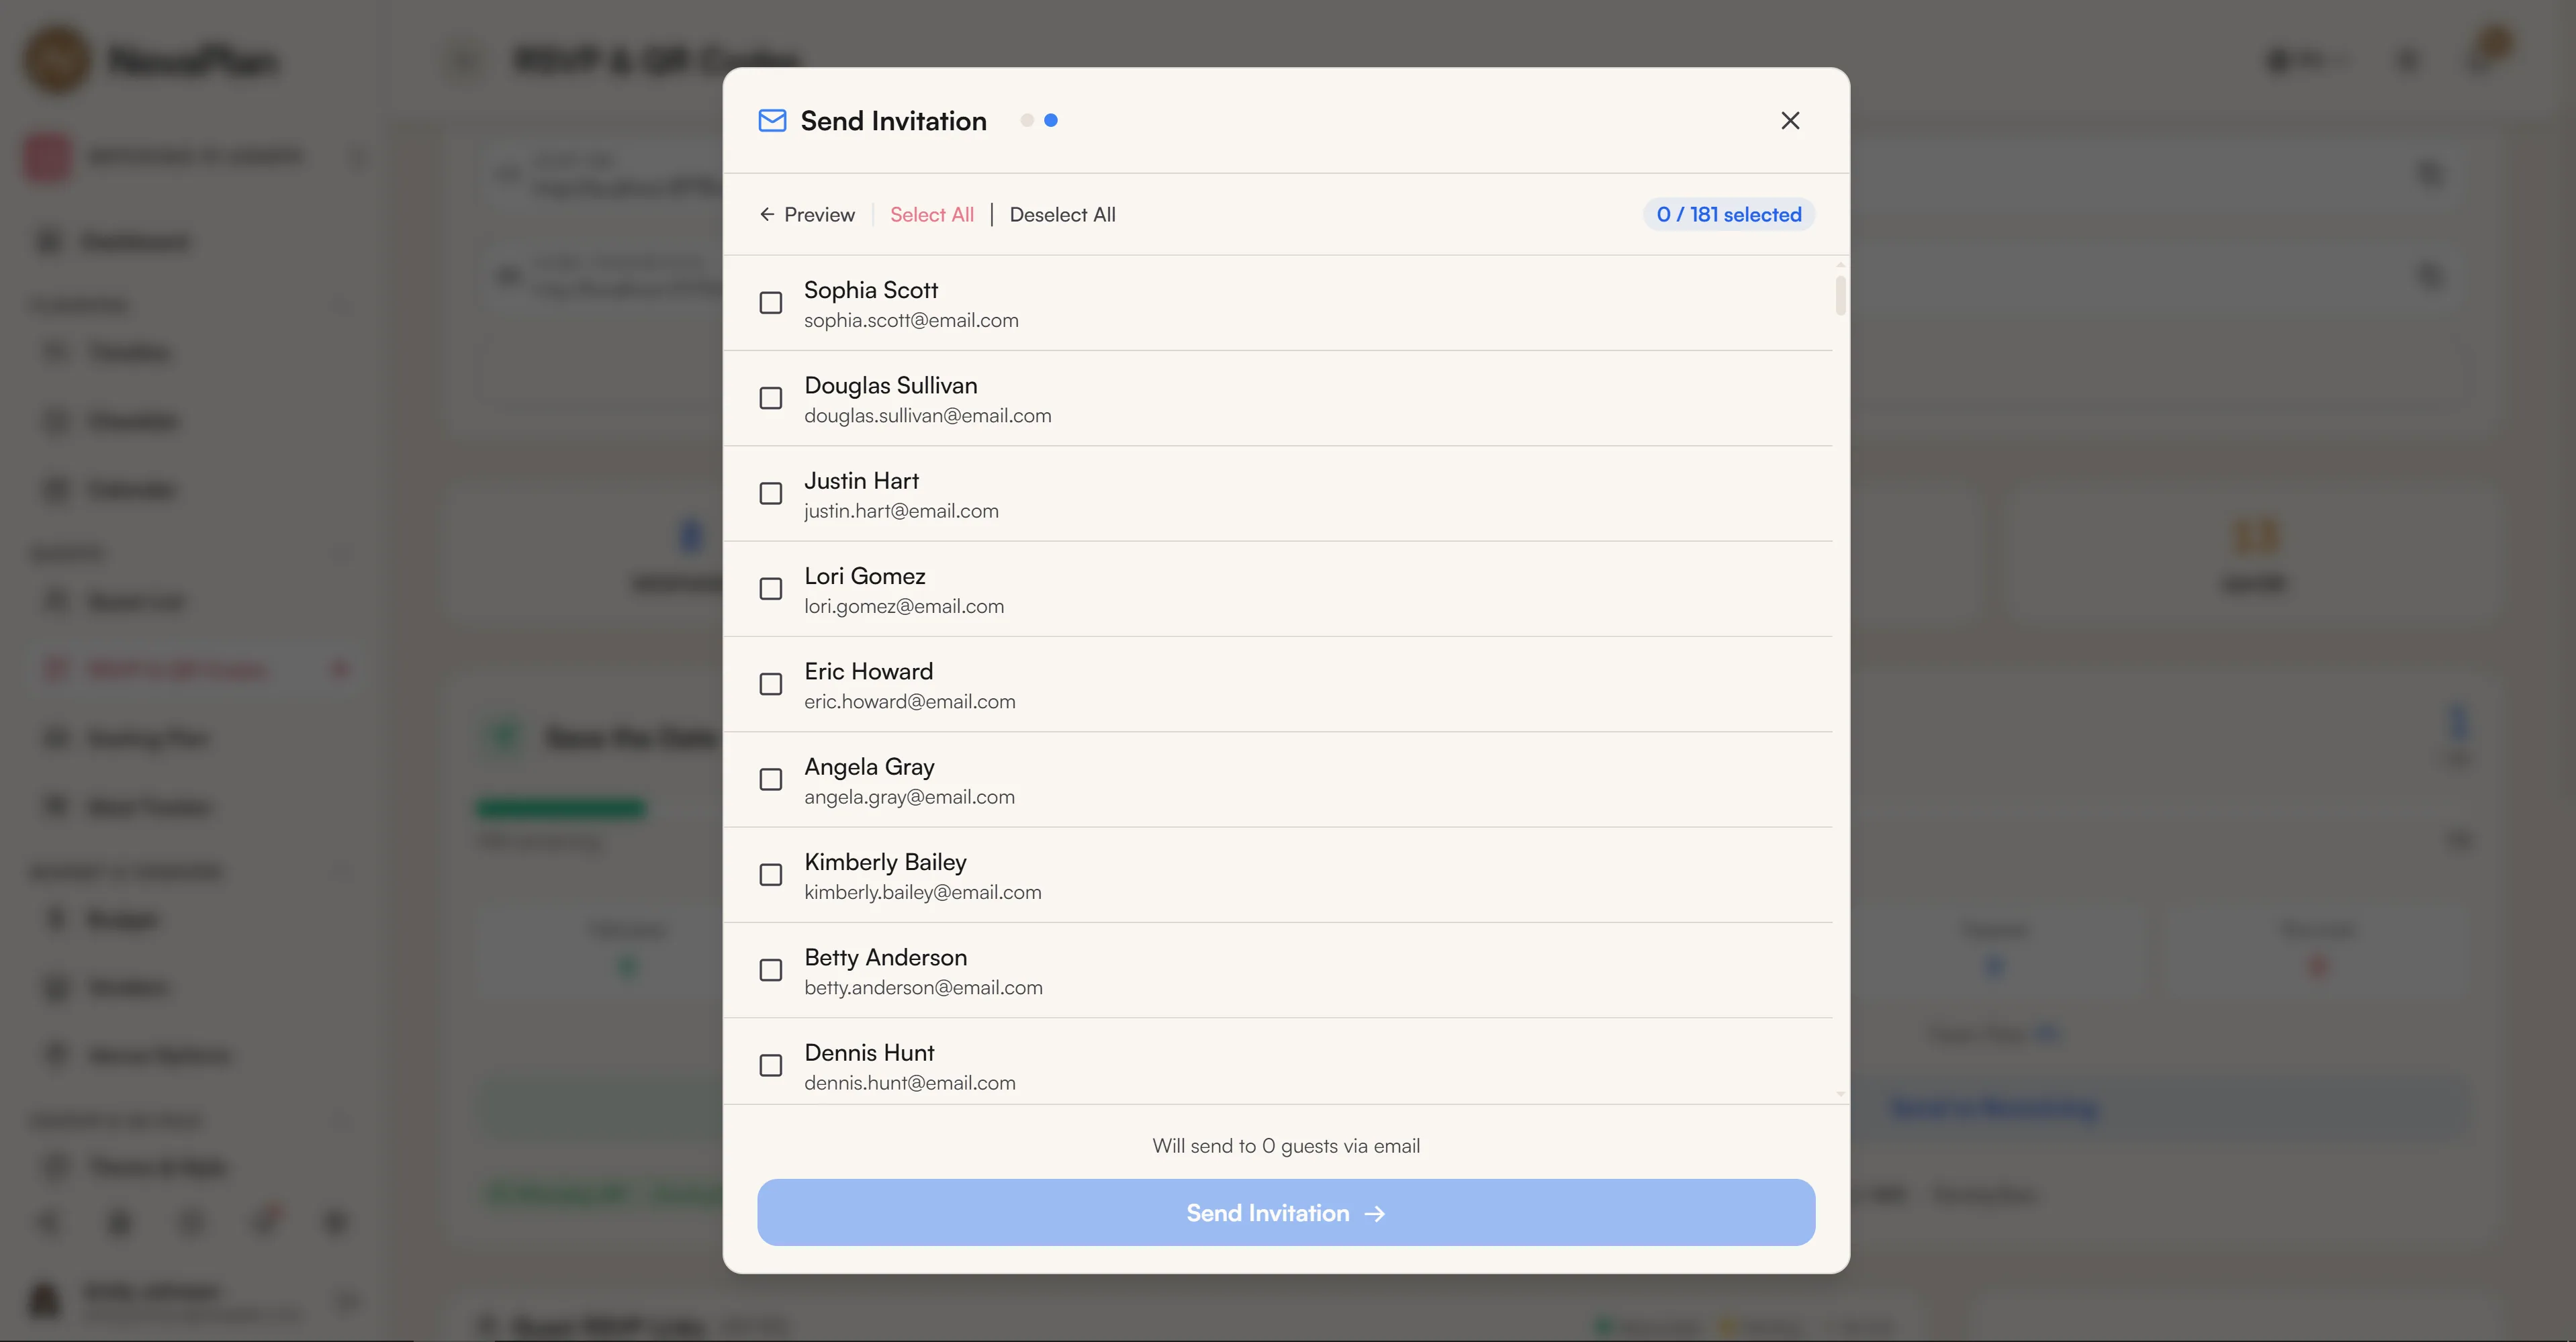
The Send Invites button opens a modal. Inside it:
- Recipient selection — filter with Select All / Deselect All
- Send count warning — "Will send email to {{count}} guests"
- Guests without email count — "{{count}} guests without email"
- Send Now button → on success, toast: "Email sent successfully!"
If you don't want to email guests you've already invited, the Send to Remaining Guests option sends only to those not yet contacted.
Automatic sending isn't possible for guests without an email. You'll need to send to them over WhatsApp or manually — use Copy Link to grab the link and send it yourself from your messaging app.
4. Track responses
The stat cards at the top of the page:
- Total Guests — total guests
- Responded — number who responded
- With Token — those who have a personal link generated
- Headcount — expected total people (guests + their companions)
For guests you've emailed, extra metrics:
- Delivered — successfully delivered
- Opened — opened
- Bounced — undeliverable
- Open Rate — open percentage
Response updates are real-time — the moment a guest responds from their link, it reflects on the dashboard and the guest list.
RSVP Settings
Two settings are made from the same page:
- RSVP Deadline — the final response date
- Custom Message (
rsvpMessage) — the custom text your guest sees on the RSVP page
For example: "Please respond by September 1. We're unable to accommodate guests with children, so we appreciate your understanding."
On save, toast: "RSVP settings saved".
QR Table Cards (PDF)
The Download QR Table Cards (PDF) button downloads the QR cards you can stand on your guests' tables as a PDF. On the wedding day, a guest scans the QR to reach the photo-sharing page.
What the guest sees
When a guest opens their personal link:
- They see your names, the date, the location, and your custom message
- They're recognized by name (automatically from the token)
- Three buttons: Attending / Not Attending / Maybe
- Choosing Attending or Maybe opens the companion count (0–10) and the meal/dietary/allergy fields
- They complete a CAPTCHA (Cloudflare Turnstile, for spam protection)
- Submit → a thank-you screen + a photo-sharing link
The guest can return to the same link and change their response — the last submission wins, the system doesn't keep the previous one.
For the detailed guest flow: How to explain RSVP to your guests.
There's no name search on the public RSVP page — a guest can only respond via their personal link. A guest who loses their link will reach out asking you to resend it. You can resend it with Copy Link from the RSVP & QR Codes page; the token stays the same.
Next steps
After RSVP is enabled and invites are sent:
- Track meal selections — relay dietary/allergy info to your caterer
- Build a seating plan for confirmed guests
FAQ
No, it's fixed once generated. It can't be changed so that links you've already distributed don't break. Make sure it's right when you first generate it.
Click Copy Link from the guest's row and resend it. The token stays the same — the guest sees their previous response and can change it, without starting from scratch.
Two possibilities. 1) The dashboard uses a 2-minute cache, so refresh the page. 2) The guest tried to respond from the main RSVP page (without a token) instead of their personal link — the system requires a token, so it doesn't save the response. Resend the guest their personal link.
The system uses the default Wedding Invitation template, generated in multiple languages. You can't change the design directly, but it inserts the custom text you wrote in the rsvpMessage field.
The public RSVP page closes, and a guest who clicks the link sees an "RSVP Unavailable" message. You can keep entering responses manually from the Guest List.
The system protects in three layers: 1) Responses are only accepted via a personal link (token). 2) Every submission requires a Cloudflare Turnstile CAPTCHA. 3) There's a rate limit of 10 RSVPs per minute per IP. A bot attack is practically impossible.