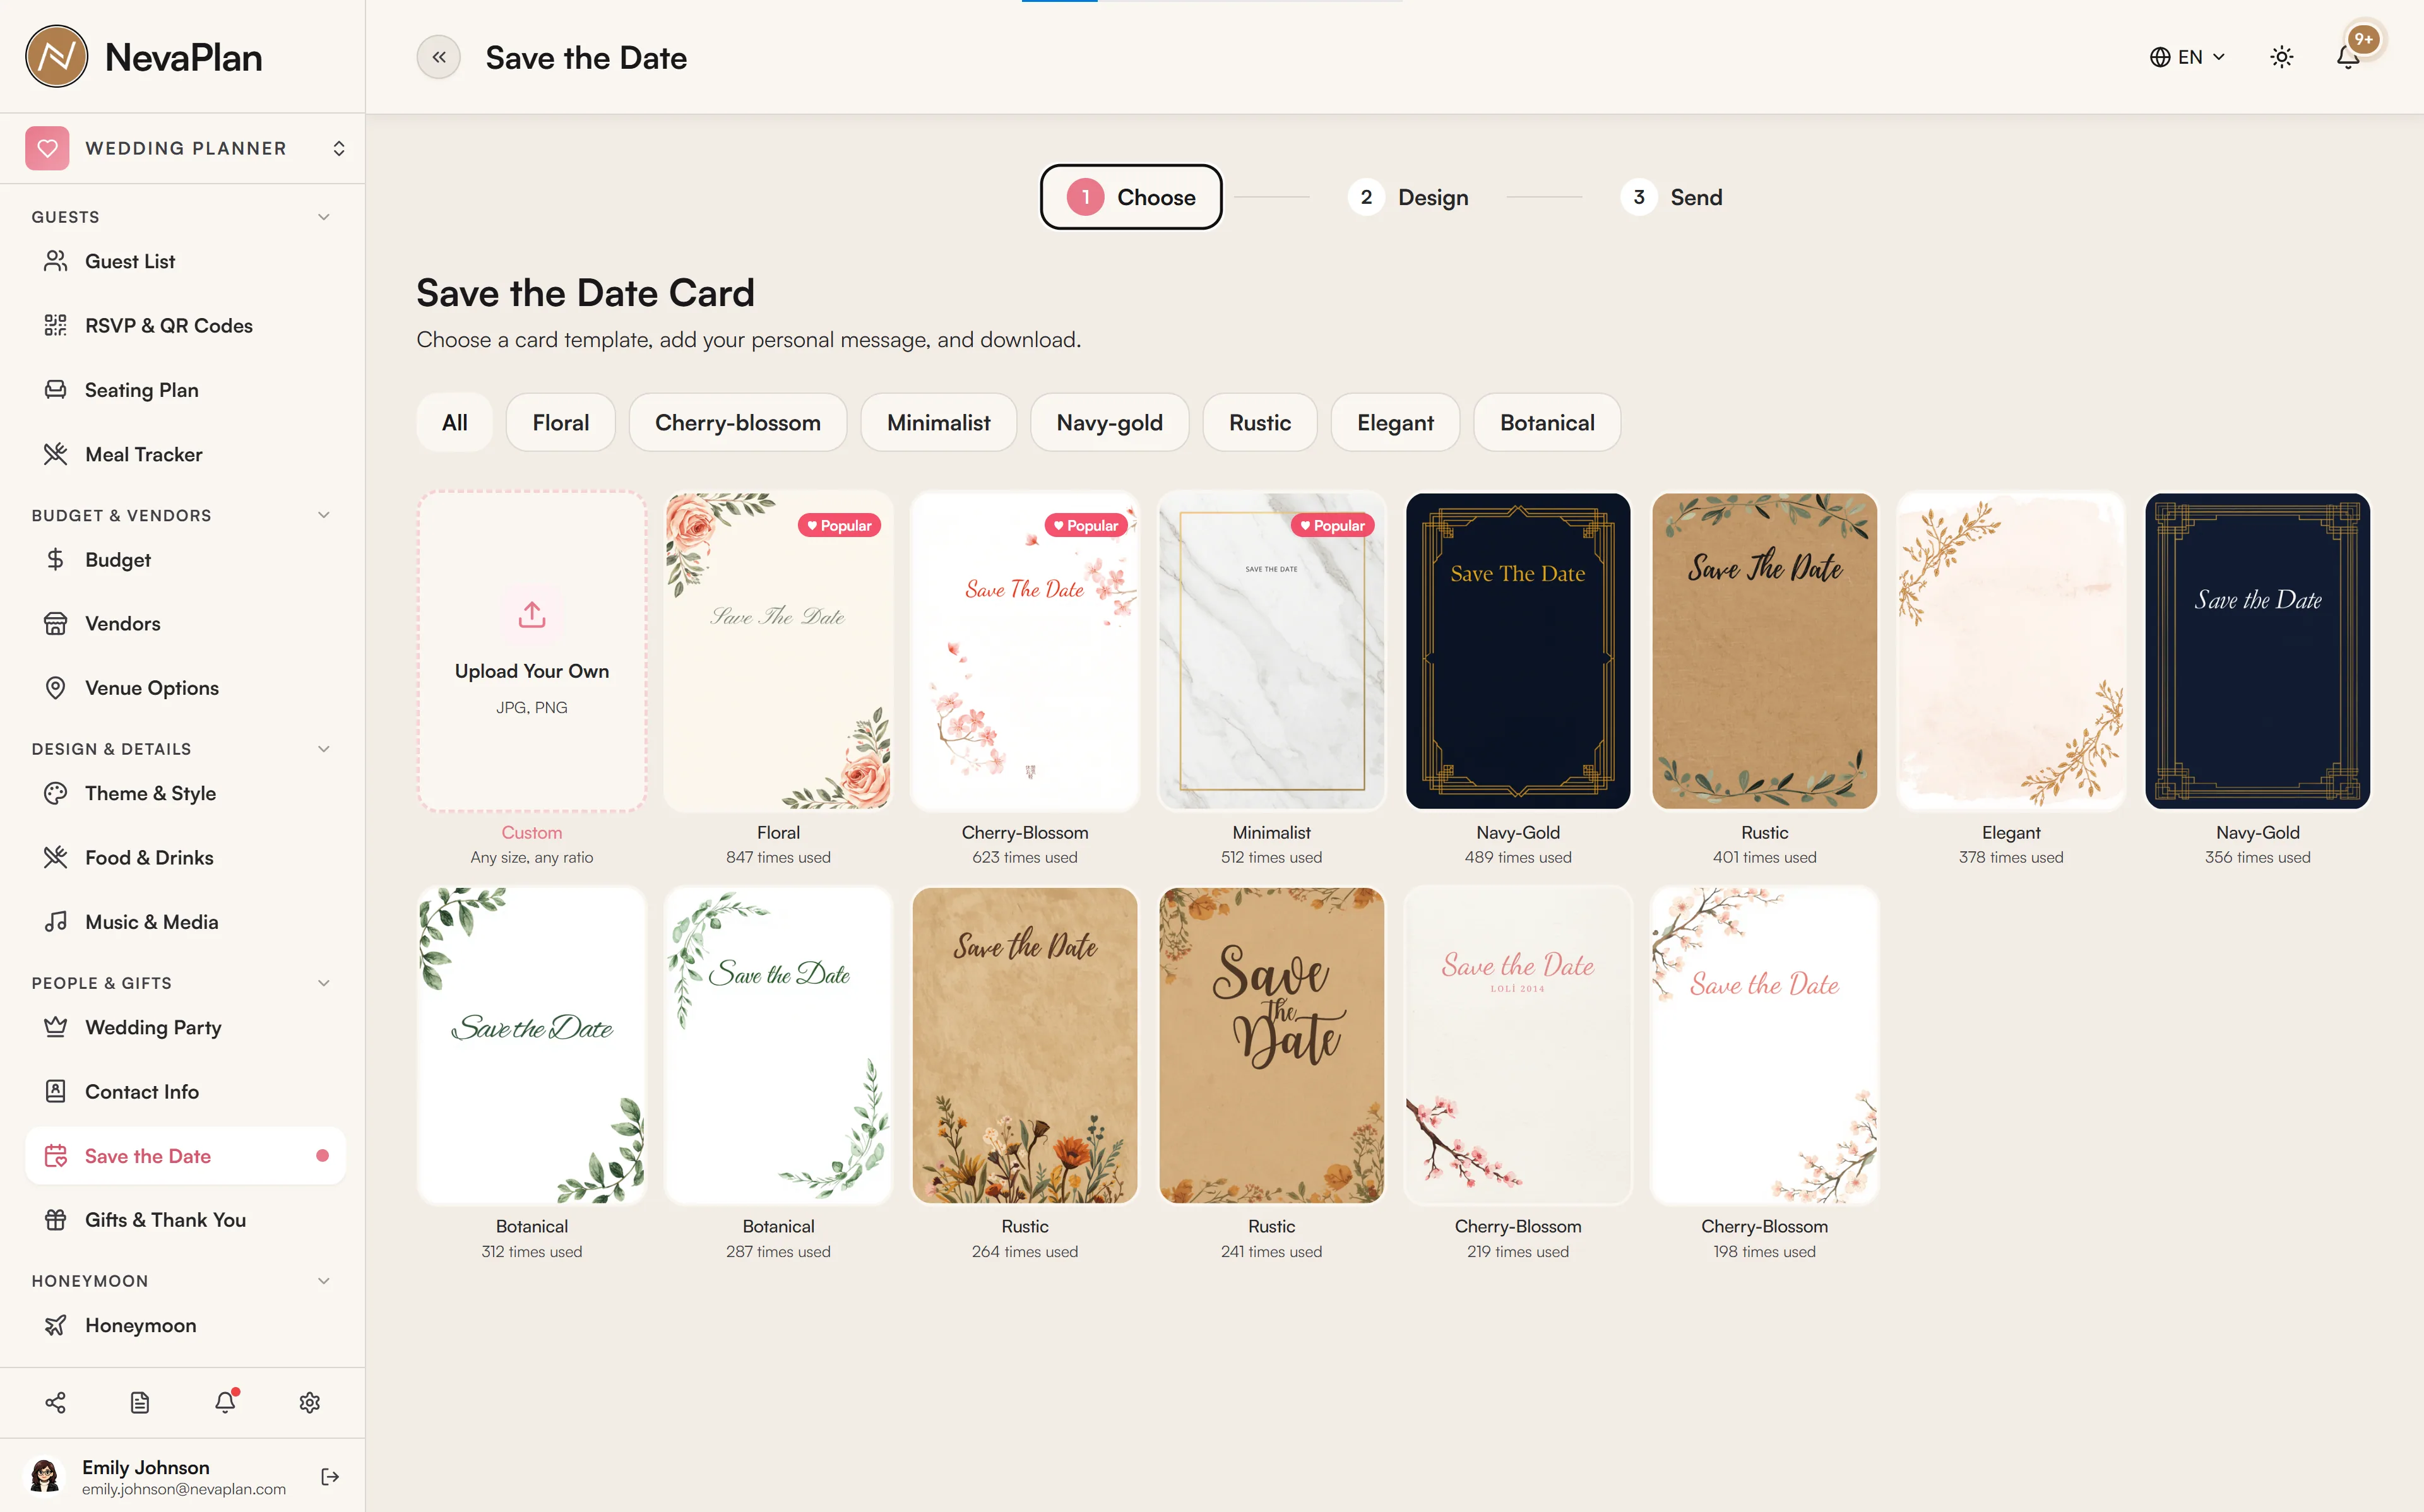
The save the date is your guests' first official heads-up — the "block this weekend" message that goes out months before the formal invitation. The Save the Date page gives you a template gallery and a live editor so you can produce a polished card without design software.
Two stages: pick, then personalize
The page works in two views:
- Gallery — browse the ready-made card templates, filtered by style
- Editor — once you pick one, customize it on a live canvas
Press Select on a template you like to drop into the editor.
Personalizing the card
In the editor, the card shows on a canvas with editable text layers. For each piece of text you can adjust:
- The wording itself
- Font — choose from the built-in font set
- Size and color
- Alignment (left / center / right)
- A subtle text shadow for legibility over busy photos
- Position — drag the text directly on the canvas to place it
Your names are pulled in automatically from your wedding setup, so the card already says the right thing. A [Guest] placeholder is replaced with each recipient's name when you send, so every card feels personally addressed.
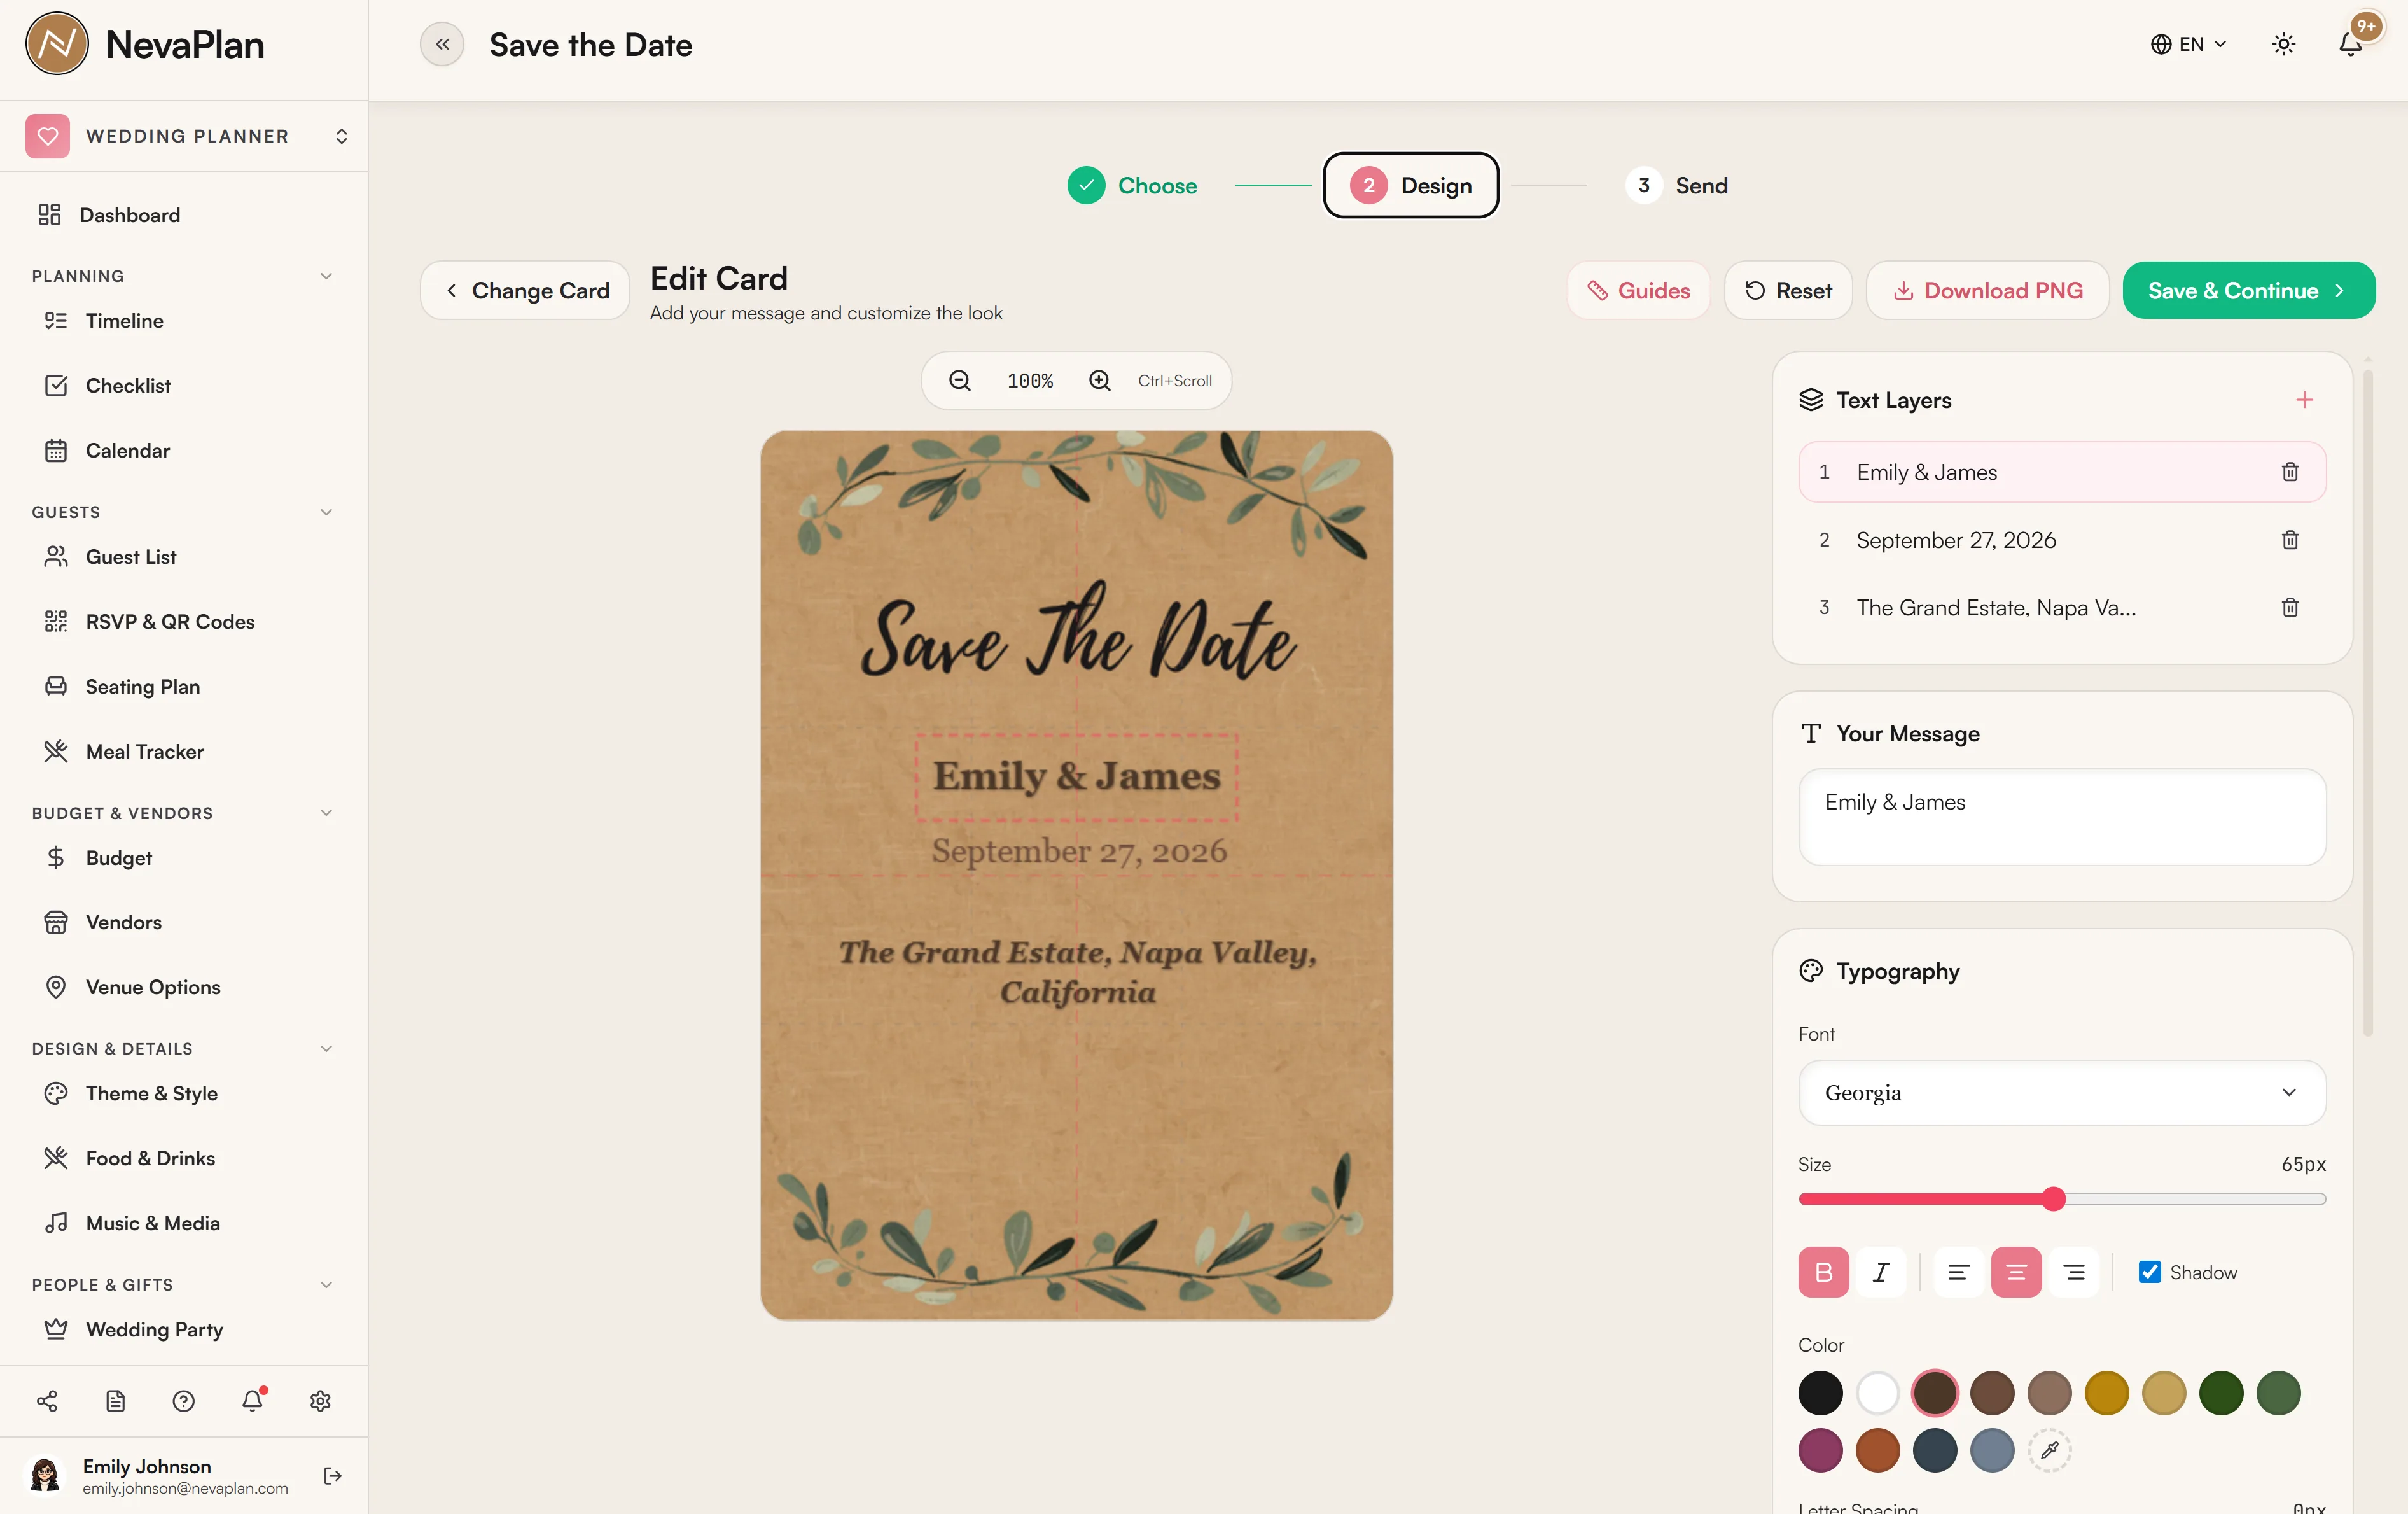
Turn on Guides while you position text — the center and rule-of-thirds lines plus the safe margin keep your wording balanced and away from the edges (important if you'll print). Hold Shift while dragging to lock movement to one axis for clean alignment.
Saving and downloading
Two outputs:
- Save — stores your design so it's there when you come back (the editor reloads your last-saved card automatically)
- Download PNG — exports a high-resolution image (sized for print and email) you can use anywhere
The card is trimmed to its artwork automatically, so you don't get extra whitespace around the edges.
Sending to guests
Press Send to Guests to move into the send flow, where you reach your guest list and dispatch the card by:
- Email — sent through the system to guests with an email address
- WhatsApp — opens a prepared message you send from WhatsApp yourself
This is the same send machinery used for invitations, so the recipient selection and "guests without email" handling work the same way. For the full sending mechanics, see Enabling RSVP and sending guest links.
The save the date is a "block the date" note, not the full invitation — keep it light. Names, date, and location (or just the city) are enough. Detailed logistics, RSVP, and the registry belong on the later invitation and your couple page.
A sensible order of operations
- Finish your wedding setup — so your names and date flow onto the card
- Lock your palette — pick a template that matches it
- Build your guest list with emails/phones — so sending works
- Design here, then send
Next steps
After your save the dates go out:
- Set up RSVP ahead of the formal invitation
- Publish your couple page so guests have somewhere to land
FAQ
Yes — the card pulls your bride/groom names from your wedding setup, so a names layer is filled in for you. If you change your names in Settings, the card updates. The [Guest] placeholder is the only part that fills in per recipient at send time.
Yes. Use Download PNG — it exports at a high resolution suitable for print. Turn on Guides while designing so your text stays inside the safe margin, then take the PNG to any print service.
Drag the text layer directly on the canvas. Hold Shift while dragging to lock to a single axis (horizontal or vertical) for clean alignment, and use the Guides to line things up.
The save the date goes out early and just asks guests to hold the date — minimal detail. The invitation comes later with full logistics and the RSVP link. This page is for the save the date; the RSVP/invitation flow lives on the RSVP & QR Codes page.
Yes — press Save and the editor restores your last-saved card the next time you open it. Downloading a PNG doesn't save the editable design, so Save first if you want to keep editing later.